
 United States | EN
 Canada | EN
 United Kingdom | EN
 German | DE
 France | FR
 Mexico | ES
 Japan | JA
 China | ZH
Types of Metallography Preparation
Mechanical Preparation & Etching
Mechanical preparation is the most widely used method in metallographic sample preparation. This approach involves the systematic refinement of the sample surface through material removal, with the primary objective of eliminating deformation and damage introduced during prior processing steps. Material removal is achieved using abrasive media applied in progressively finer stages.. The sample may be examined in the polished state, or etching may be used to reveal microstructures. Chemical etching is most common, with a wide range of etchant recipes developed for each material to reveal specific structural detail.
Commonly used equipment and consumables in mechanical preparation include grinding and polishing systems, vibratory polishers, diamond grinding discs, silicon carbide (SiC) abrasive papers, and polishing cloths of varying types. Abrasives, such as diamond suspensions and final polishing oxide solutions, are also routinely used to achieve the desired surface quality.
The final surface condition is determined by the specific analytical requirements. For high-resolution microstructural characterization, specimens are typically prepared to a mirror-like, deformation-free finish that enables detailed observation. Alternatively, preparation may be terminated once the surface quality meets the requirements of a given inspection or testing method.
Cleaning and Drying
Cleanliness throughout the entire process is critical to avoid contamination problems. This includes the specimen, the user’s hands, and the equipment. After the last polishing step, the samples should be cleaned to remove abrasives and debris. This is typically achieved by swabbing with a liquid detergent solution following by rinsing under warm water, then with ethanol and dried in a stream of warm air. Alcohol can be used for washing if the specimen cannot tolerate water. Ultrasonic cleaning may be needed if the specimens are porous or cracked.
By optimizing the degree of preparation, metallographers can achieve accurate and reproducible results while balancing preparation time and resource efficiency. Appropriate selection of preparation parameters—including equipment, consumables, and process steps—requires careful consideration of both the material characteristics and the intended analysis.
Electrolytic Preparation and Etching (Traditional and NeoTerra)
Electrolytic preparation is less widely used than mechanical methods but offers distinct advantages for specific applications. Electrolytic polishing processes can provide rapid, effective, and highly reproducible surface preparation when properly controlled. These methods typically involve fewer processing steps.
Metallography Grinding and Polishing Machines
Manual Grinding and Polishing Machines
Manual grinding is the process of holding the sample to the preparation surface by hand. It was historically in widespread use, but it now typically only found in high-throughput laboratories as a means of eliminating the mounting step. Manual grinding requires a high level of operator skill to achieve consistent, high-quality results. In addition, manual grinding and polishing may introduce ergonomic strain and potential safety concerns. Manual techniques are based on long-established practices. The following guidelines provide key considerations for achieving successful results in manual grinding and polishing.
Semi-Automatic Mechanical Grinding and Polishing Machines
Vibratory Polishing Machines
Vibratory polishing is an advanced metallographic finishing technique that produces a deformation-free surface with minimal operator effort. It is widely used for applications requiring high-quality surface finishes, particularly where preservation of microstructural integrity is critical. It can be used on any material or combination of materials but is particularly effective for preparing sensitive, soft, or ductile materials that are prone to deformation during conventional mechanical polishing.
Mechanical Preparation Methods
How to Grind and Polish Metallography Samples
It is important to choose the correct method for your material and for analysis. The chart below indicates recommended grinding and polishing steps by material type. See our SumMet guide for details on rotation direction, time and speed.
For details on these recommended methods see our SumMet guide.
Typical Grinding and Polishing Methods by Material
| Group | Material | Grinding Steps | Polishing Step 1 | Polishing Step 2 | Polishing Step 3 | Polishing Step 4 |
|---|---|---|---|---|---|---|
| Electronic Materials | Non Populated Printed Circuit Board | CarbiMet 320 grit [P400] 600 grit [P1200] |
TriDent™ 9µm MetaDi™ Supreme Diamond |
TriDent 3µm MetaDi Supreme Diamond |
ChemoMet™ MasterPrep™ Alumina |
|
| Silicon in Micro-Electronics | CarbiMet 600 grit [P1200] |
VerduTex™ 6µm MetaDi Supreme Diamond |
VerduTex 3µm MetaDi Supreme Diamond |
VerduTex 1µm MetaDi Supreme Diamond |
ChemoMet MasterMet™ Silica |
|
| Micro-Electronic Material | CarbiMet 320 grit [P400] |
TexMet™ P 9µm MetaDi Supreme Diamond |
VerduTex 3µm MetaDi Supreme Diamond |
VerduTex 1µm MetaDi Supreme Diamond |
ChemoMet MasterPrep Alumina |
|
| Ferrous & Non-Ferrous Materials | Soft Aluminum Alloys | CarbiMet 320 grit [P400] |
TexMet C 9µm MetaDi Supreme Diamond |
TexMet C 3µm MetaDi Supreme Diamond |
TexMet C 1µm MetaDi Supreme Diamond |
ChemoMet MasterMet Silica |
| Nickel Based Superalloys | CarbiMet 240 grit [P280] |
Apex Hercules H or S 9µm MetaDi Supreme Diamond |
TriDent 3µm MetaDi Supreme Diamond |
ChemoMet MasterMet Silica |
— | |
| Titanium Alloys | CarbiMet 320 grit [P400] |
UltraPad™ 9µm MetaDi Supreme Diamond |
ChemoMet MasterMet Silica |
— | — | |
| Copper & Copper Alloys | CarbiMet 220 grit [P240] - 320 grit [P400] |
TexMet C 9µm MetaDi Supreme Diamond |
VerduTex 3µm MetaDi Supreme Diamond |
VerduTex 1µm MetaDi Supreme Diamond |
ChemoMet MasterMet Silica |
|
| Hard Steels | Apex DGD Red 75µm Diamond |
Apex Hercules H 9µm MetaDi Supreme Diamond |
TriDent 3µm MetaDi Supreme Diamond |
MicroCloth™ MasterPrep Alumina |
— | |
| Soft Steels | CarbiMet 320 grit [P400] |
UltraPad 9µm MetaDi Supreme Diamond |
VerduTex 3µm MetaDi Supreme Diamond |
MicroCloth MasterPrep Alumina |
— | |
| Cast Iron | CarbiMet 320 grit [P400] |
TexMet C 9µm MetaDi Supreme Diamond |
TriDent 3µm MetaDi Supreme Diamond |
MicroCloth MasterPrep Alumina |
— | |
| Heat Treated Steel | Apex DGD Red 75µm Diamond |
Apex Hercules S 9µm MetaDi Supreme Diamond |
MicroFloc 3µm MetaDi Supreme Diamond |
— | — | |
| Stainless & Maraging Steel | CarbiMet 120 grit [P120] - 320 grit [P400] |
UltraPad 9µm MetaDi Supreme Diamond |
TriDent 3µm MetaDi Supreme Diamond |
ChemoMet MasterPrep Alumina |
— | |
| Composites | Polymer-Matrix Composites | CarbiMet 320 grit [P400] |
TexMet P 9µm MetaDi Supreme Diamond |
VerduTex 3µm MetaDi Supreme Diamond |
MicroCloth MasterPrep Alumina |
— |
Metallographic Grinding
Metallographic Polishing
Overview of the Polishing Process
Polishing is a critical step in preparing specimens for analysis, as it removes damage from the grinding process and ensures a smooth, shiny surface. The process typically involves several stages using progressively finer abrasives. Coarse and Intermediate polishing is intended to sequentially reduce deformation, and not create a shiny surface – scratches are expected in these stages.
- Coarse Polishing: This initial stage removes the bulk of deformation caused by grinding. It uses larger abrasives on a hard napless polishing cloth.
- Intermediate Polishing: This stage further reduces surface deformation and reduces scratches, often on a medium napless cloth with finer abrasive.
- Fine Polishing: The final stage perfects the surface finish by eliminating any remaining traces of deformation using fine suspended abrasives on softer, often napped, surfaces.
Factors that influence the surface finish
Several factors can affect the quality of the polish, including:
- Abrasive Size and Type: The choice of abrasives can significantly impact the final surface quality.
- Cloth Selection: Cloth selection is critical to removal rate, flatness and deformation and is just as important as abrasive selection to specimen quality.
- Polish Time and Load: The duration and pressure applied during polishing can significantly influence flatness and removal rate.
- Rotational Speed and Direction: These parameters can affect the polishing quality and efficiency.
For detailed polishing methods tailored to specific materials see Buehler’s method by material section of the website.
Choosing Diamond Suspension
Diamond is routinely used for the preparation of most materials due to its high removal rate and low deformation depth. They are available in a wide range of micron sizes and two main diamond types. The micron size needed is determined by the material and end analysis goals.
Final Polishing
Final Polishing with Colloidal Silica vs. Alumina Abrasives
Final polishing suspensions are designed to remove the final layer of surface deformation. The removal of this deformation is essential for successful etching of sensitive materials and also when evaluating any sample with high magnifications, under polarized light or differential interference contrast, or for advanced analysis such as EBSD. Different types of final polishing suspensions employ different mechanisms for material removal.
Solutions to Common Issues in Metallography Polishing
Large Scratches
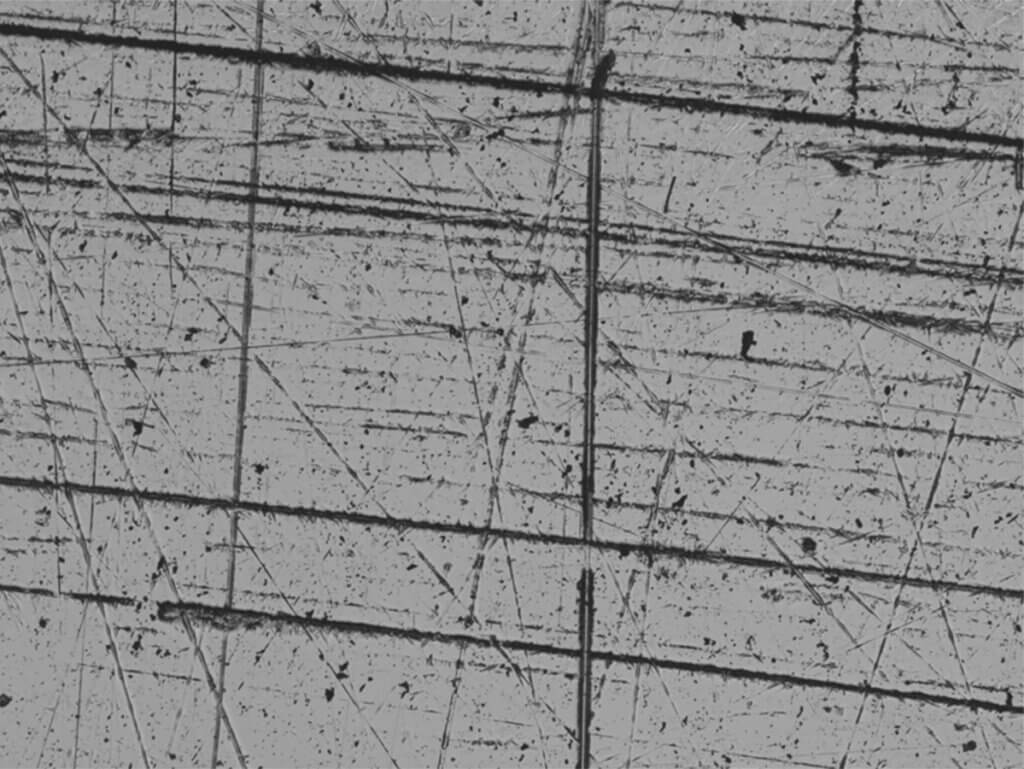
Relief
Relief is demonstrated by harder phases or constituents being left raised above the surface of the softer matrix. Prevent relief by reducing polish time, using a shorter napped cloth, or applying diamond paste rather than suspension.
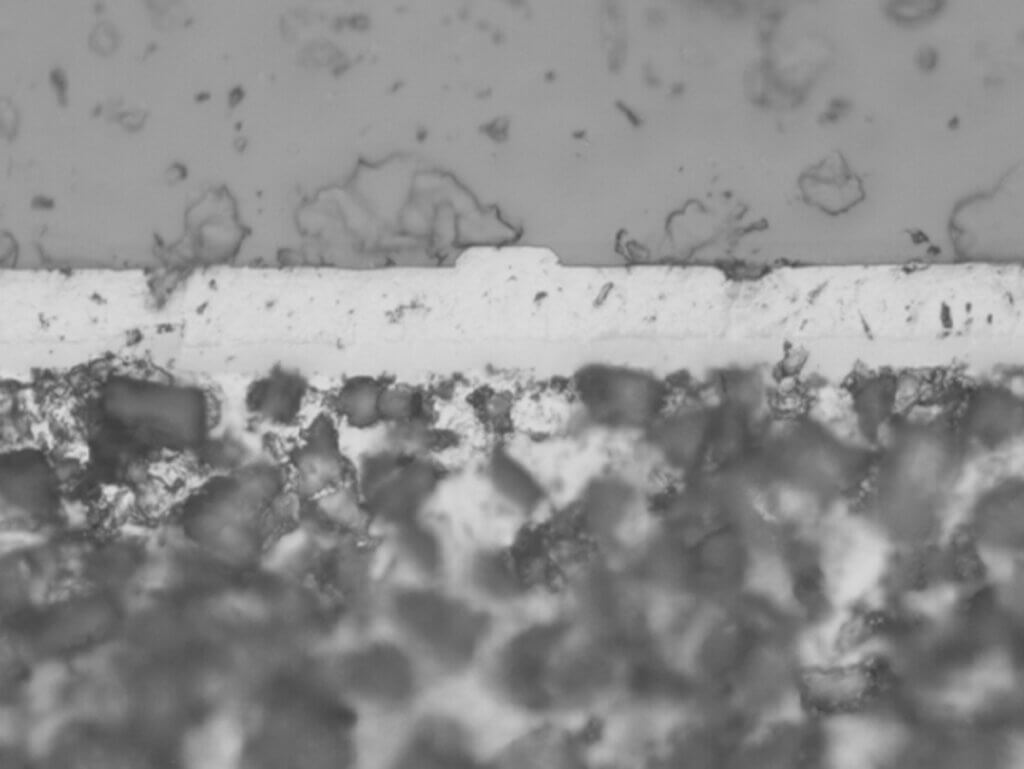
Diamond Embedding
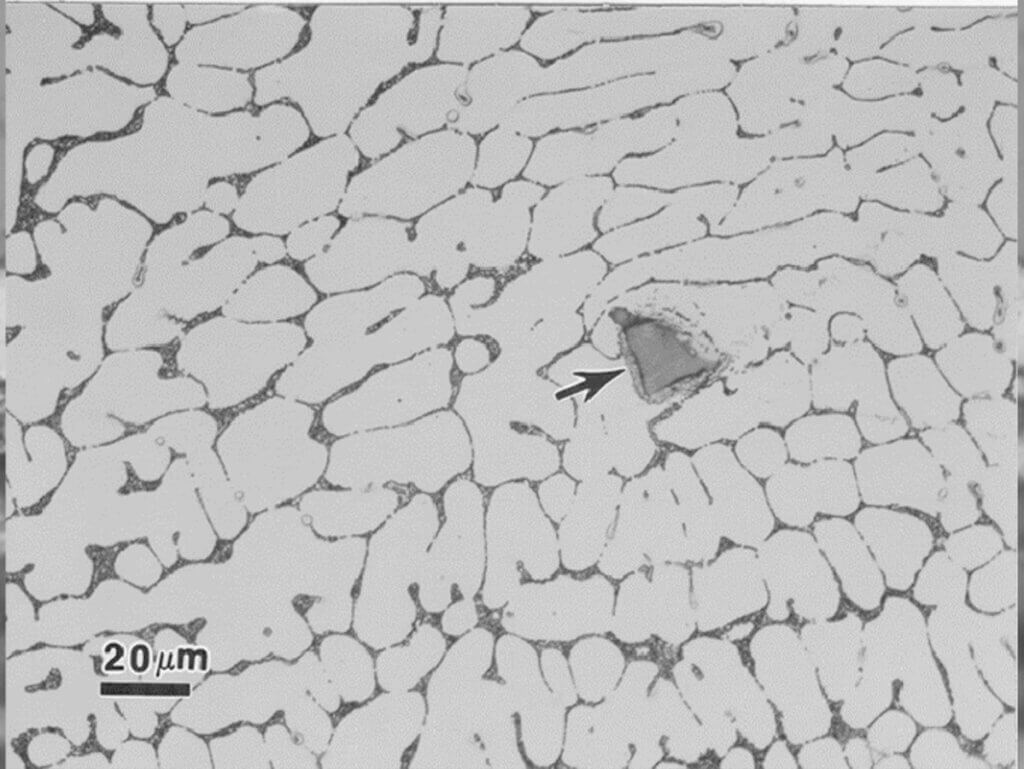
Smearing
Smearing is a superficial but significant form of damage that makes microstructural details less distinct, often caused by soft materials or poor lubrication. Smearing can be improved by using short napped cloths, vibratory polishing, or etching and then repeating the final polish.
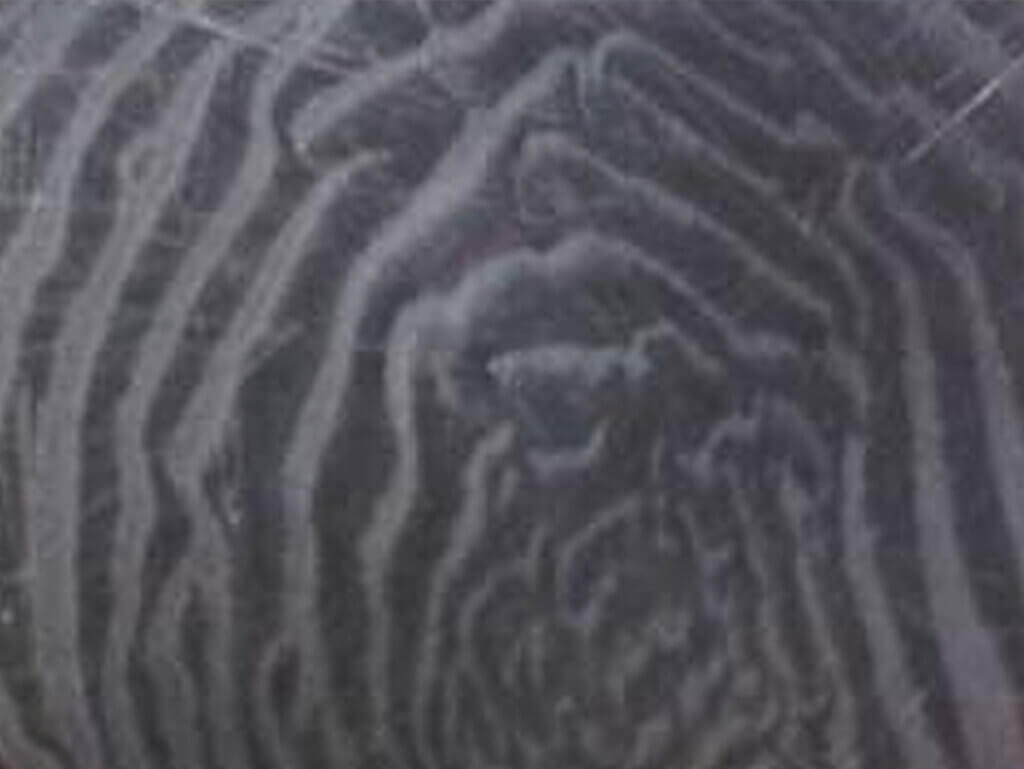
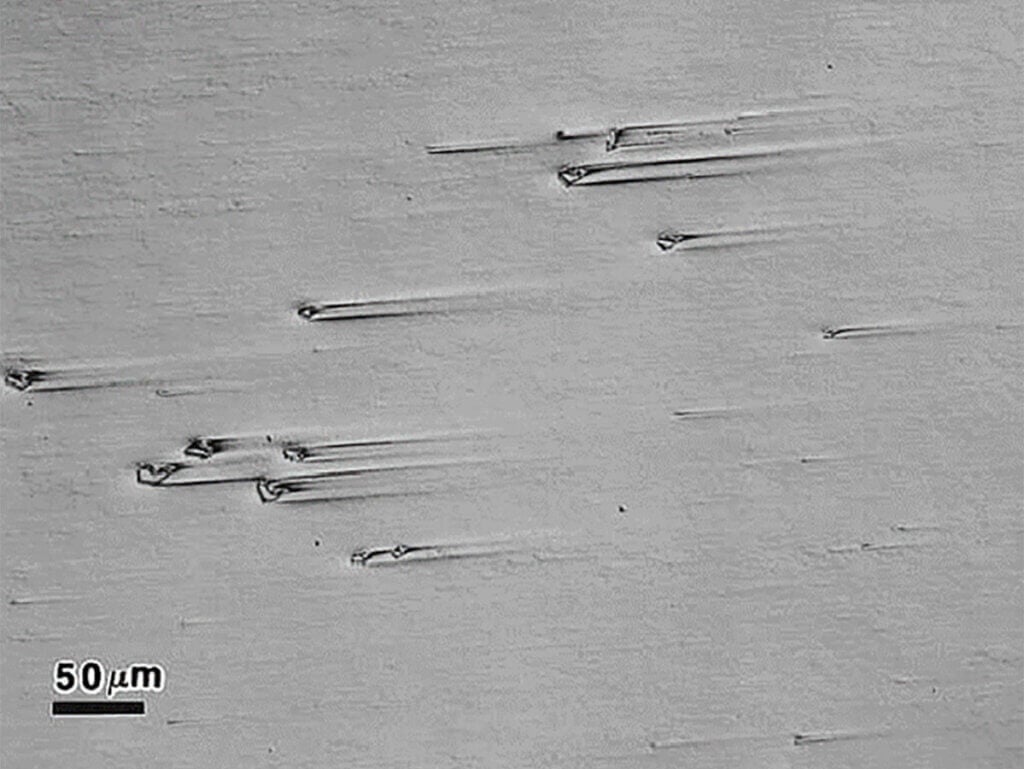
Comet Tails
Grinding and Polishing FAQs
Grinding should start with the finest grit size that will establish a flat surface and remove the effects of sectioning within a few minutes. An abrasive grit size of 180-240 (P180-P280) is usually coarse enough to use on samples sectioned by an abrasive wheel on a metallography saw – finer for very soft materials. For very hard materials such as ceramics and sintered carbides, choose diamond grinding disks with grit sizes from 125 to 75µm.
The table below shows recommended starting grit sizes for grinding different materials.
In metallography preparation, the cutting step and each grinding step produces damage itself. The depth of damage decreases with abrasive size but so does the metal removal rate. Large gaps in abrasive size would require excessive time to remove the damage from the prior step and is inefficient. 3-5 steps from initial grind to final polish are typically sufficient for most materials. Note that for a given abrasive size, the depth of damage introduced is greater for soft materials than for hard materials, but removal rate is controlled by the harder material. This means that samples with combined softer and harder components often require more preparation steps.
Many factors influence the surface finish, such as:
- Abrasive size and type
- Cloth characteristics (weave, flatness and resilience)
- Polishing time
- Specimen load
- Relative rotational direction
- Rotational speed
If help is needed to determine the correct polishing recipe, please contact our applications specialists. Buehler Solution Centers provide materials preparation and analysis training to our customers worldwide. Our mission is to deliver valuable application solutions by employing Buehler methodologies.
Polishing consists of two or more main stages, using successively finer abrasives.
- Coarse polishing follows grinding and removes the bulk of the deformation created in the grinding process.
- Intermediate polishing stages may be required to further reduce surface deformation and leave smaller scratches.
- Fine polishing perfects the surface finish by removing any trace of deformation.
On This Page
Need Help with your Sample Preparation?
Our application specialists can help you develop the right grinding and polishing process for your material and analysis needs.
Explore the Metallographic Grinding and Polishing Guide Series
Manual vs. Semi-Automatic Metallographic Grinding and Polishing
Compare manual and semi-automatic grinding and polishing methods, including specimen manipulation, central force, and individual force preparation.











10 Responses
For Colloidal Silica used in the final polishing, if flushing it with water during the last 10-15 seconds to remove the silica on the surface, will pitting occurs in that circumstances?
No, we would not expect pitting to occur with flushing. It’s possible that you are seeing a different problem. Please contact us at lab.us@buehler.com with further details and we can assist further!
Buehler’s extensive reference to grinding and polishing is an invaluable tool for novices and experts in the field of materials science alike. Vancouver Anodizing Their knowledge and commitment to assisting readers in achieving exceptional outcomes in sample preparation are evident in this piece.
Thank you, Vancouver. We pride ourselves on our expertise and sharing knowledge with the wider community
Thanks for sharing this insightful information
Thank you for your comment!
Fantastic guide! Clear, concise, and incredibly helpful. I’ve been struggling with grinding and polishing techniques, but this blog has provided me with valuable insights and tips. Can’t wait to apply them to my projects. Thanks for sharing!
Thank you Ultra. You can find more extensive information in our Solutions section!
Hello, I’m texting from Penn State University. We have rectangular polyurethane samples and a polishing stone for manual polishing. We need a protocol to successfully polish the PU samples surfaces. Can you help us? We need to know which kind of abrasive sand paper we need, how and how long we should rub the samples on the paper and if we need to use only water or any other chemical (without altering the superficial properties of the material).
Hi Felice – we have short guide for the preparation of polymers here:
https://buehler.com/assets/solutions/Methods-by-material/19_SumMet_Polymers.pdf
The steps given in Table 48 can also be applied using hand preparation.
The approach outlined should work well for your samples. If you need additional support once you get started, please contact us directly!