Rockwell hardness testing methods are defined in the following standards: ASTM E18 Metals, ISO 6508 Metals, and ASTM D785 Plastics. It is recommended that operators have a current copy of the relevant standards, which are updated regularly.

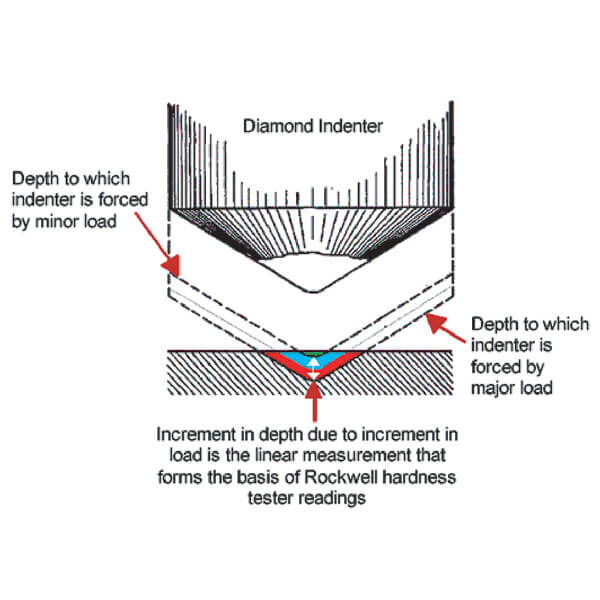
The Rockwell hardness test is based on the measurement of the depth to which an indenter is forced by a heavy (major) load beyond the depth resulting from a previously applied preliminary (minor) load. The test follows the sequence, see Figure 23.4 to your right:
- Application of minor load. A ‘zero’ position is recorded.
- Gradual application of load until the major load is reached. The maximum penetration position is recorded.
- Removal of load until the minor load is reached
The resulting Rockwell number represents the difference in depth from the zero datum position as a result of the application of the major load. The entire procedure requires as little as a few seconds (up to 15 for plastics), so the major advantage of the Rockwell test is that results are quickly and directly obtained without the need for a secondary, dimensional measurement requirement.
There are two types of Rockwell test (Table 23.1):
- Rockwell: the minor load is 10 kgf, the major load is 60, 100, or 150 kgf.
- Superficial Rockwell: the minor load is 3 kgf and major loads are 15, 30, or 45 kgf.

Table 23.1: Some common scales in Rockwell and Superficial Rockwell testing
In both tests, the indenter may be either a diamond cone or tungston carbide ball, depending upon the characteristics of the material being tested. Rockwell hardness values are expressed as a combination of a hardness number and a scale symbol representing the indenter and the minor and major loads. The hardness number is expressed by the symbol HR and the scale designation.
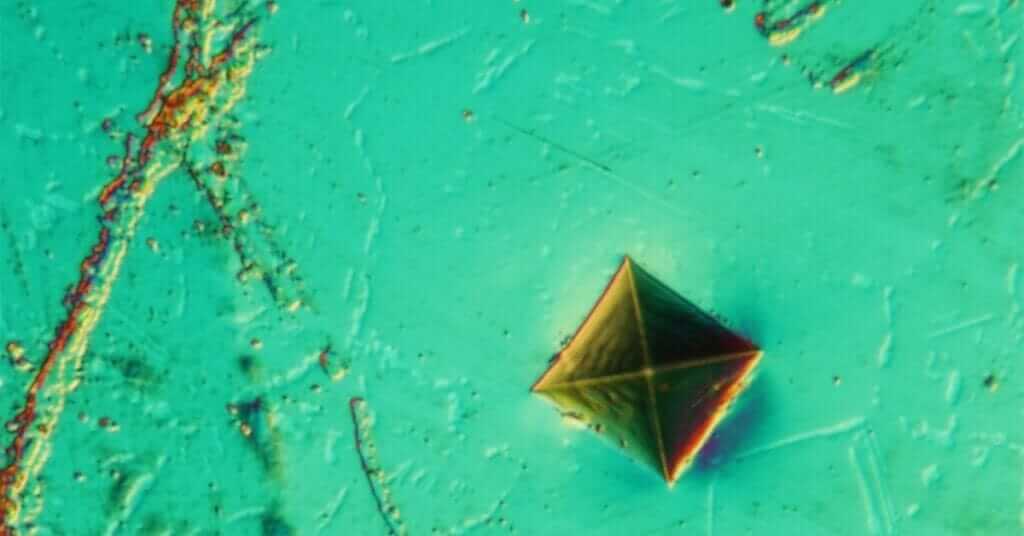
The most common indenter type is a diamond cone ground at 120 degrees for testing hardened steels and carbides. Softer materials are typically tested using tungsten carbide balls ranging in diameters from 1/16 in up to 1/2in. The combination of indenter and test force make up the Rockwell scale. These combinations make up 30 different scales and are expressed as the actual hardness number followed by the letters HR and then the respective scale. A recorded hardness number of 63HRC signifies a hardness of 63 on the Rockwell C scale. Higher values indicate harder materials such as hardened steel or tungsten carbide. These can have HRC values in excess of 70HRC. Rockwell test forces can be applied by either closed-loop load cell or traditional deadweight systems.
Factors Affecting Accuracy, Precision and Bias for Rockwell Testing
One of the primary factors affecting the precision and reliability in the Rockwell test is the test machine itself. Variability in test results is the sum of the variability from the equipment and variability from the operator and environmental conditions. Tests of Gauge Repeatability and Reproducibility (GR&R) can show the degree to which machine variability takes up the available process tolerance. High variability (or a narrow process tolerance) results in high GR&R. A GR&R test on different equipment used for the same process allows the user to directly compare the in-built variability of the machine values (the lower the GR&R value, the better the performance of the equipment), see Figure 23.5. Research has shown [39] that closed-loop loading systems, as well as other design factors and build quality, can greatly improve the performance of the equipment.
Rockwell testing is usually perceived to be one of the simpler testing methods, and indeed in principle it can be very quick and accurate. However, it is important to ensure that the condition of the machine, specimen and set-up are correct to ensure consistent and accurate results. There are, in fact, many factors that can adversely affect the Rockwell result. For the most part, they can be avoided by ensuring that correct practices are carried out, and by proper calibration and maintenance.
One of the more common sources of error is simply indenter damage. Diamond indenters are very hard, but also relatively brittle, and so it is possible for them to be damaged by a heavy impact. Such damage (or excessive wear of the tip) will change the resistance to penetration, and typically result in a high hardness reading. A deformed Ball indenter can similarly induce high readings.
Another common cause of error is deflection in the loading train. This can come from many sources, all of which will typically cause low readings for Rockwell hardness. If the anvil is damaged, or per- haps has had an indent put into it, then any raised material at the surface will absorb some deflection under loading. Similarly, if there is dirt or grease in the contact area between the anvil and the elevating screw or the elevating screw mechanism itself this will cause excess deflection and change the hardness reading.
The specimen itself is clearly of importance in getting good results. While Rockwell testing is insensitive to surface preparation relative to optical test methods, the better the surface condition the more accurate and reproducible will be the results. The under-side of the specimen must also contact the anvil securely and without interference from debris or other loose material. Specimens should always be cleaned before testing. The specimen must also be held in a stable manner during the test, as any movement of the specimen can significantly affect the result. A movement of 2µm is equivalent to 1 Rockwell point. Excess vibration from the local environment or unsuitable table can cause similar problems.
It should be apparent from the above that if the operator is adequately trained on proper fixturing and testing techniques, the environment is suitable for testing, and that proper cleanliness and maintenance regimes are carried out then most of the problems described above can be avoided.
For additional information on hardness testing, refer to the Buehler SumMet Guide.


